This module has been developed so that anyone can use and configure it without difficulty.
The module provides encrypted communication with the server and robust encryption of sensitive data.
This module is not refundable.
This WiseCP module allows you to offer your customers VPS from a VPS reseller purchased from a hosting company.
Features
Administrator area:
- Create a VPS.
- Suspend a VPS.
- Delete a VPS.
- Upgrade a VPS.
- Start a VPS.
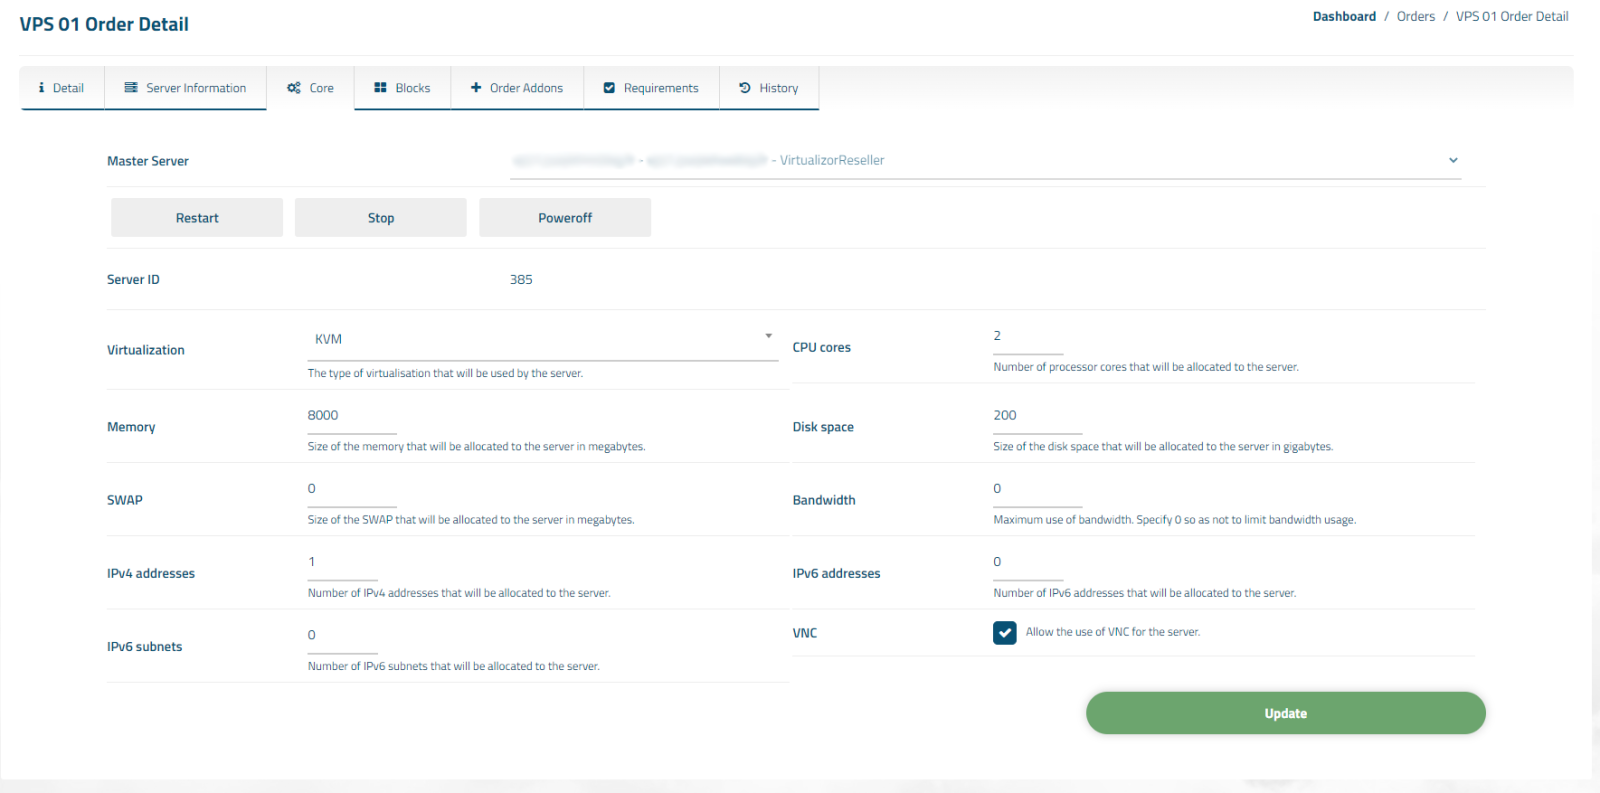
- Restart a VPS.
- Shut down a VPS.
- Force shutdown of a VPS.
Customer Area:
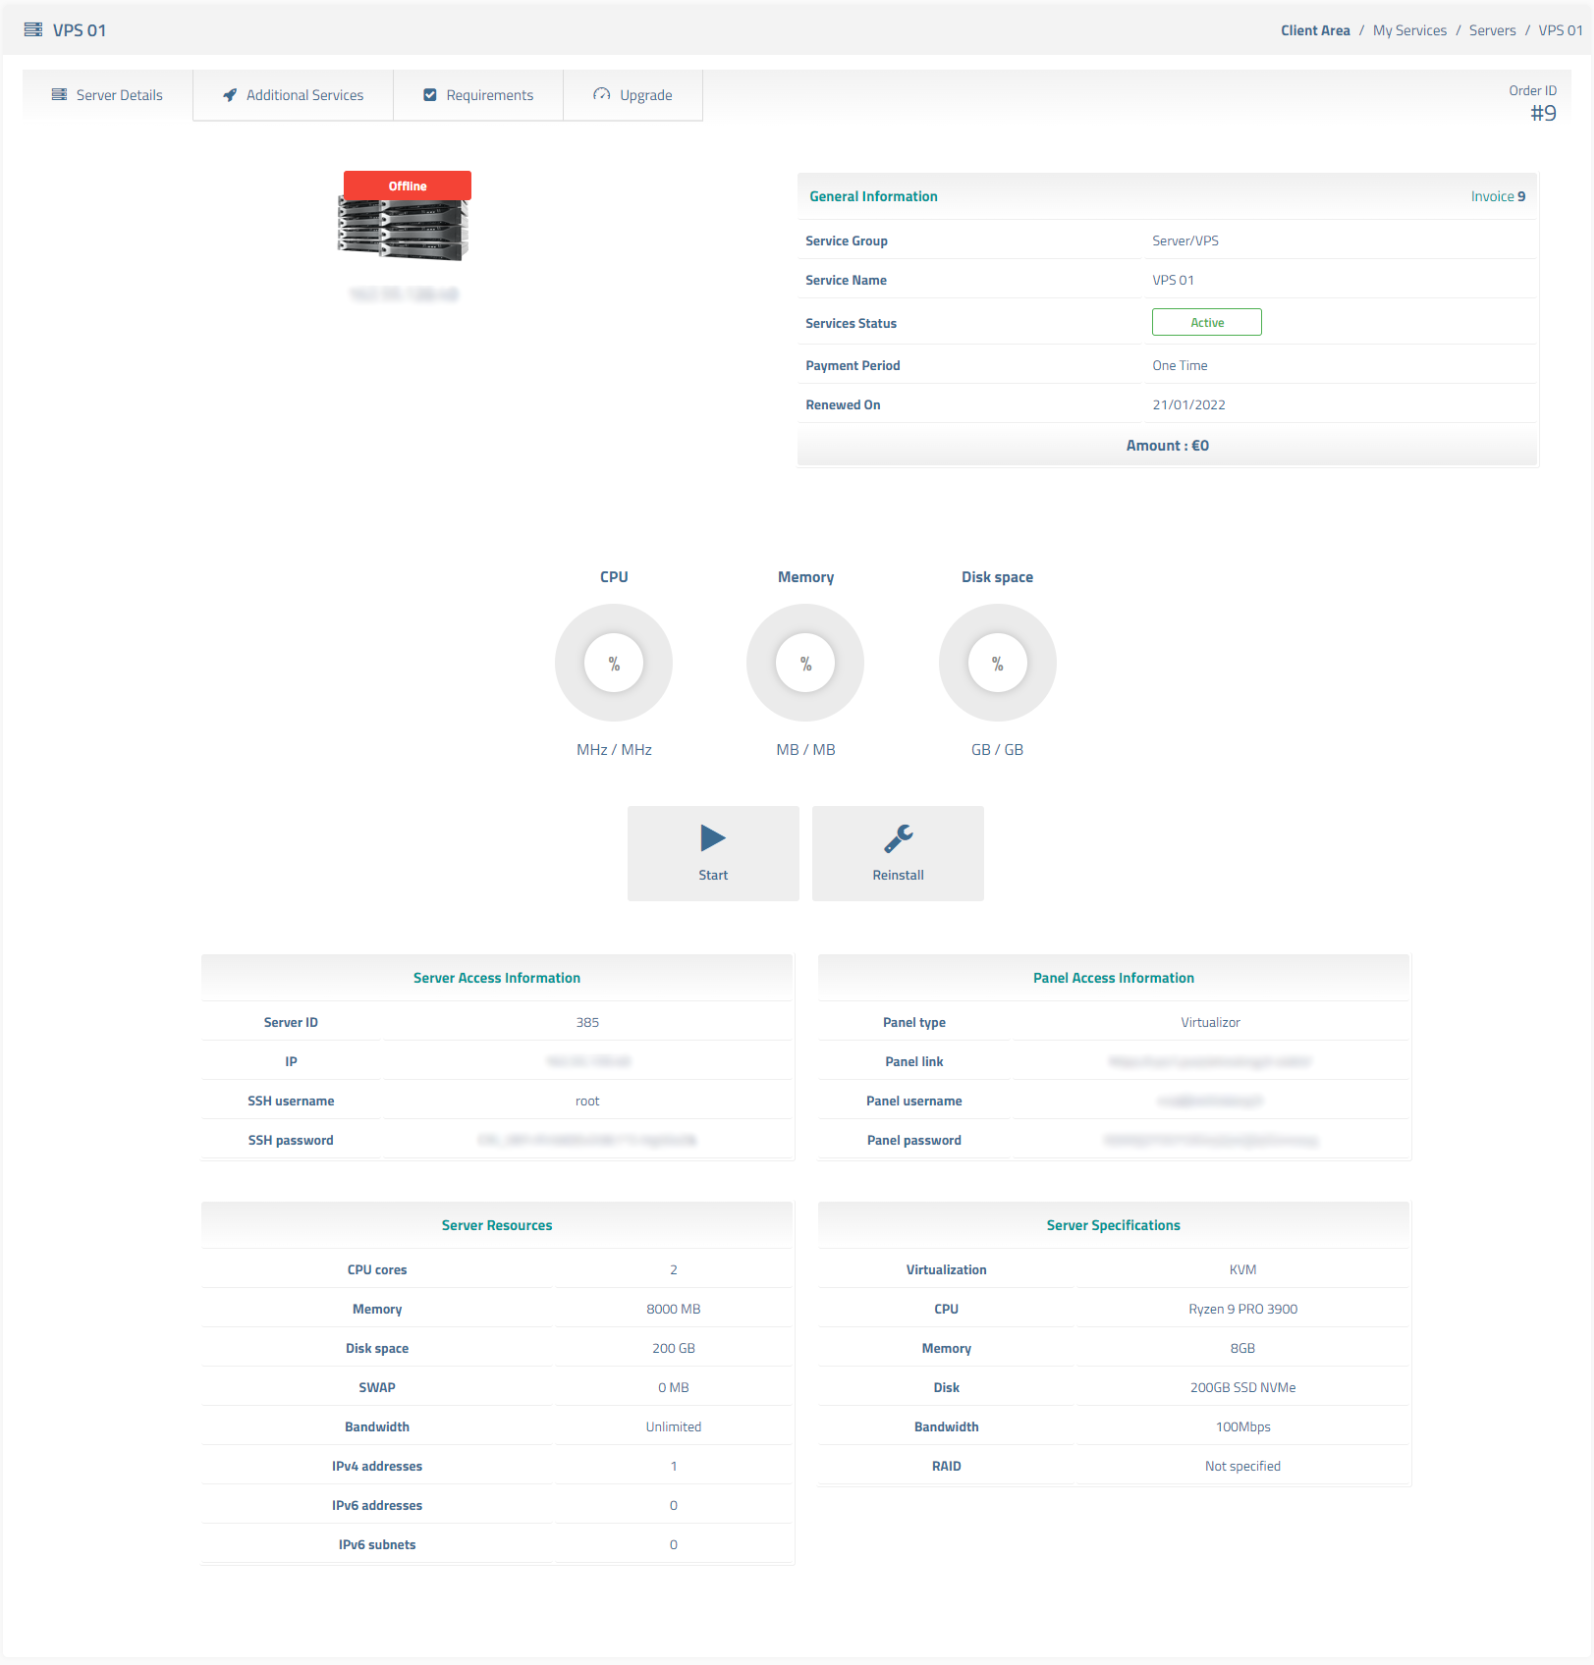
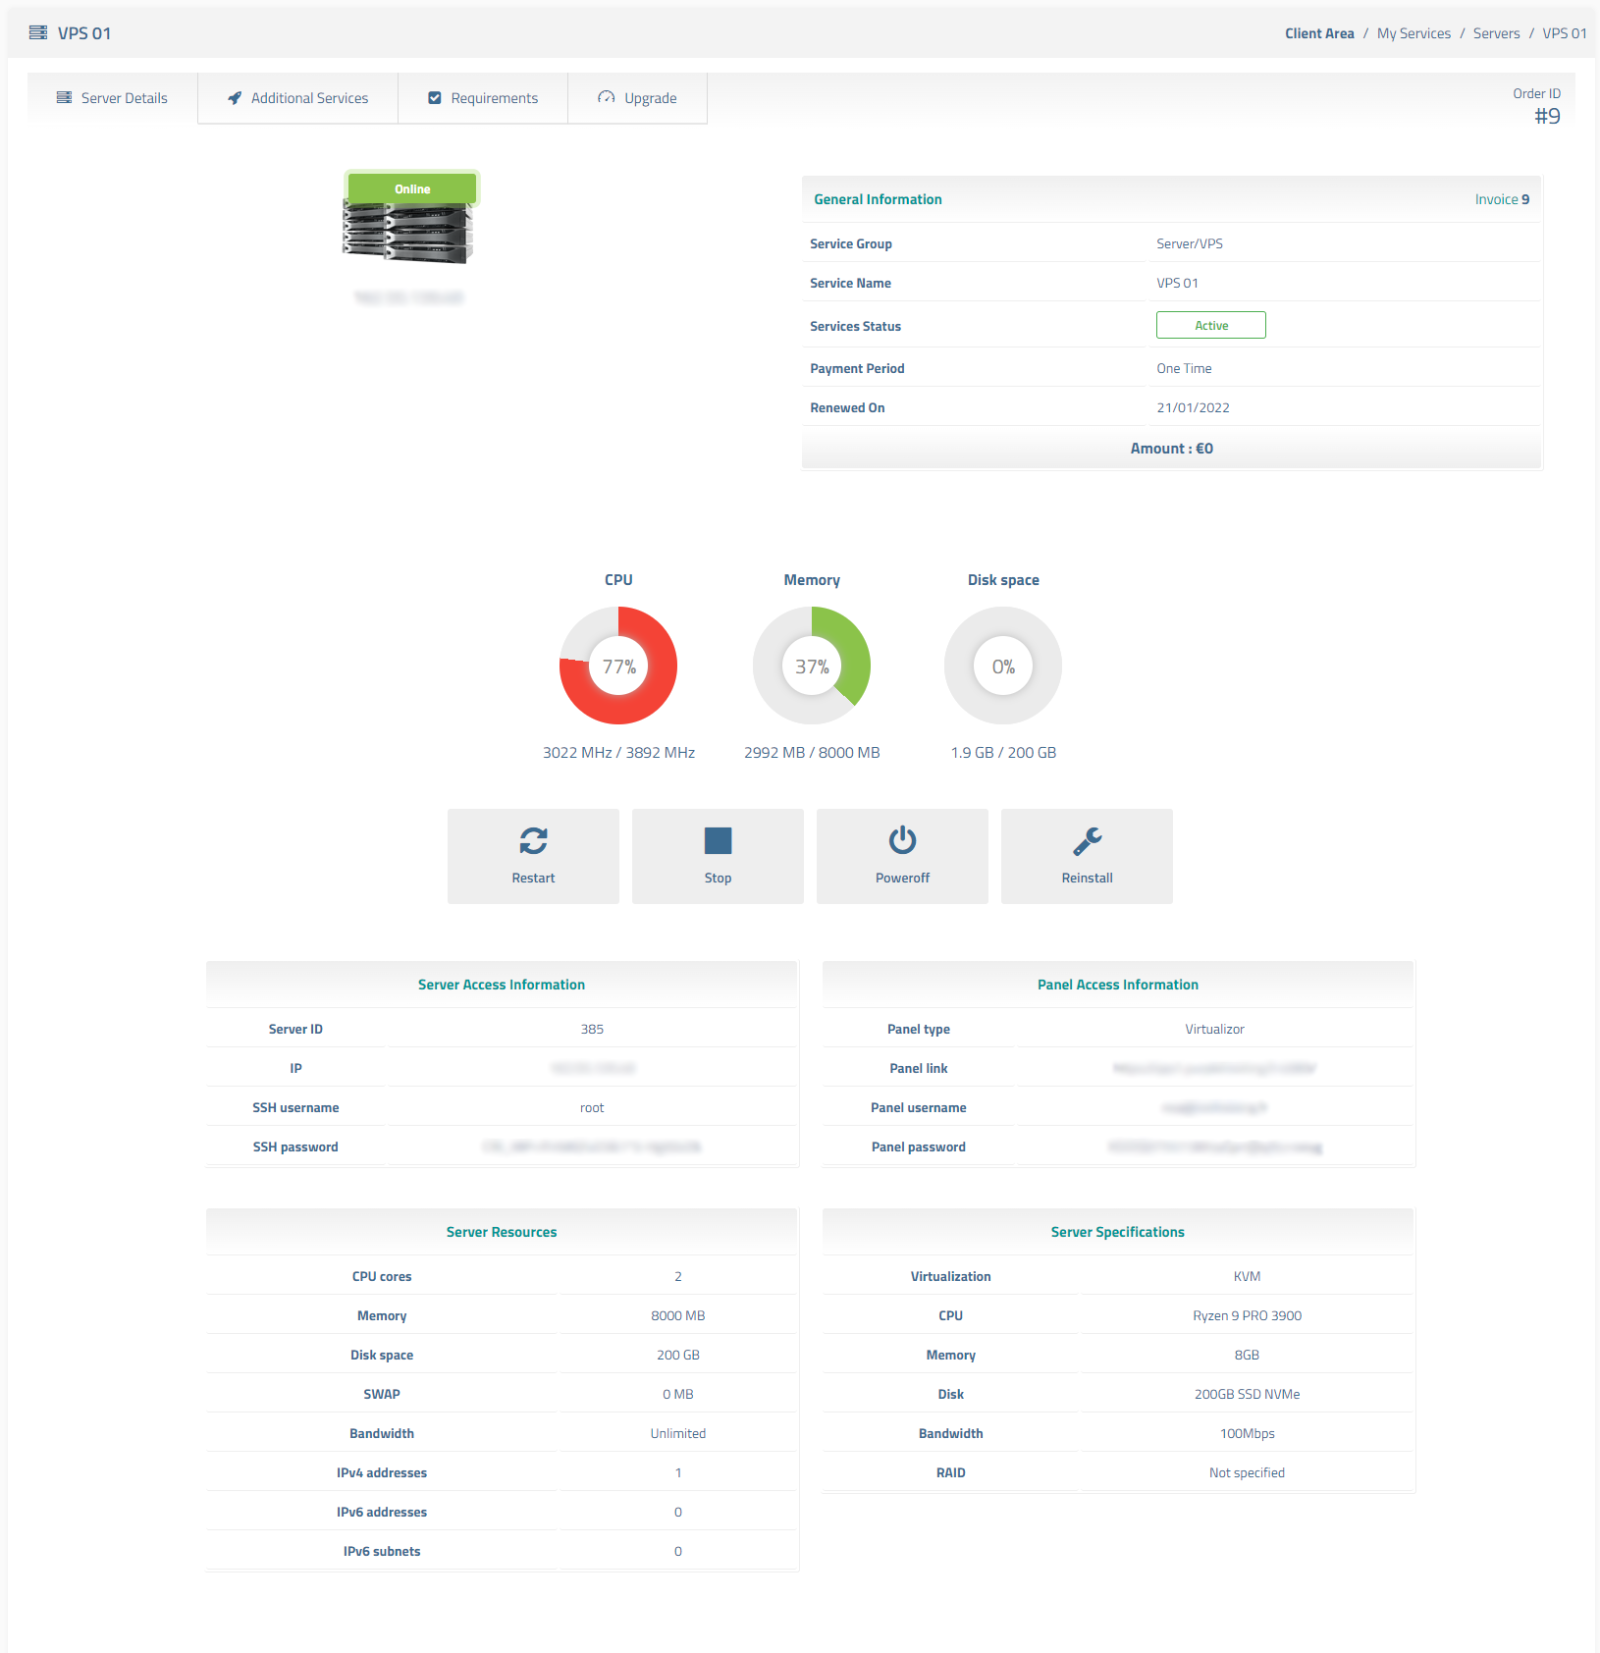
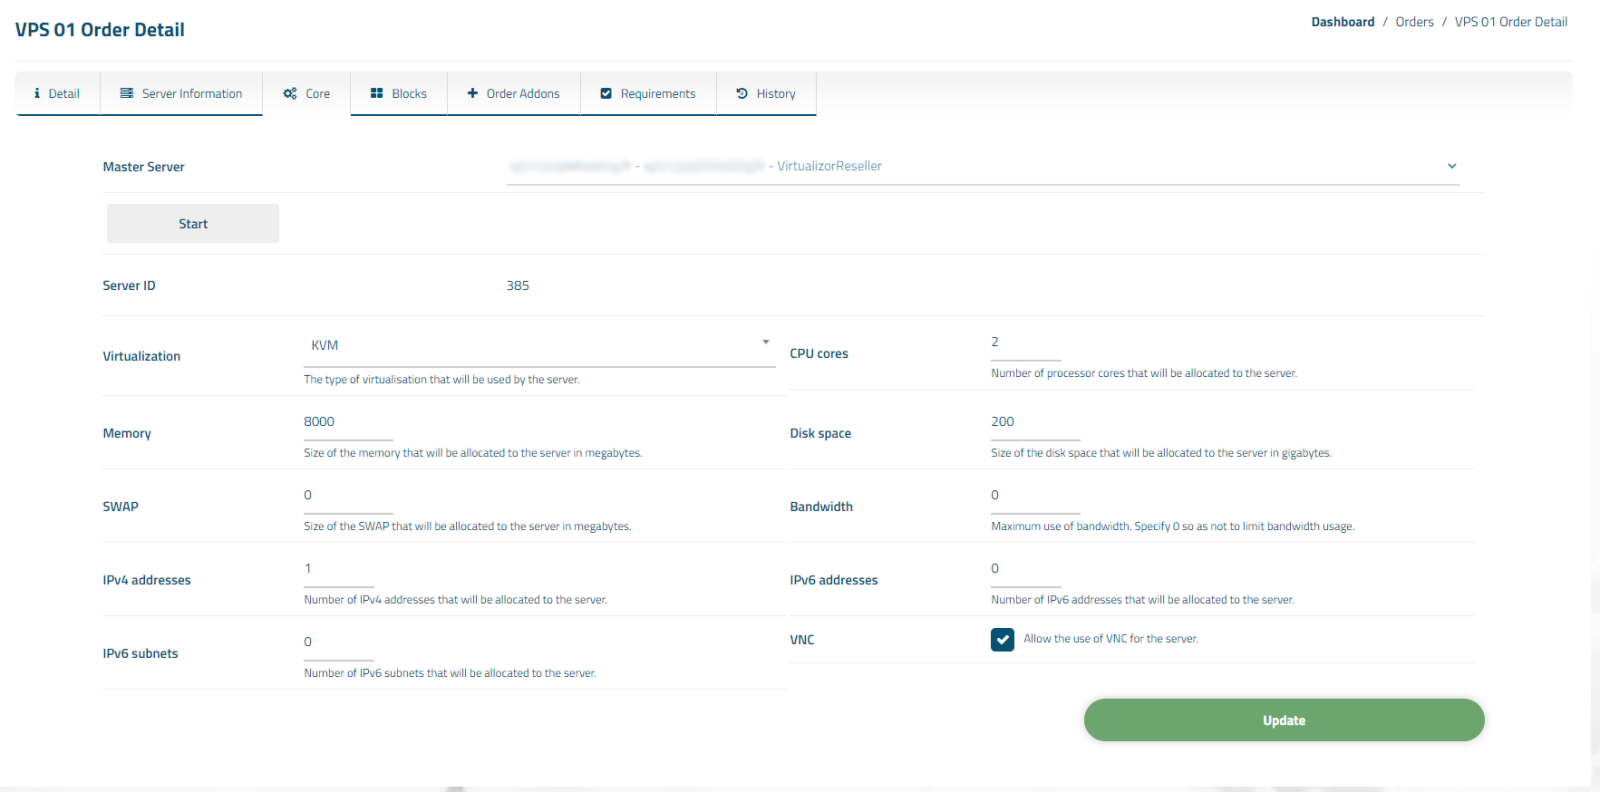
- View the status of a VPS.
- Start a VPS.
- Restart a VPS.
- Shut down a VPS.
- Force shutdown of a VPS.
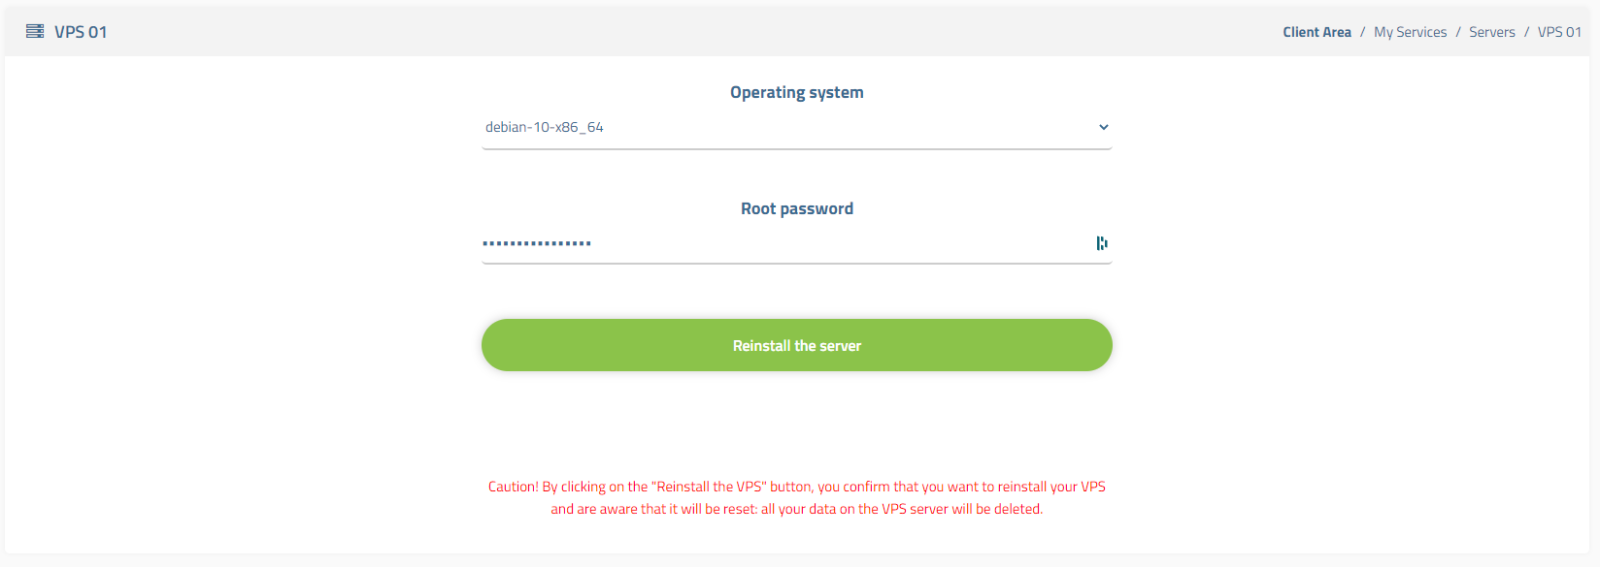
- Reinstall a VPS.
- Know the resource usage of a VPS with the help of graphs and values (CPU, RAM, disk space).
- SSH and Virtualizor panel access credentials.
- Information about the VPS (Virtualization, CPU, RAM...).
Screenshots 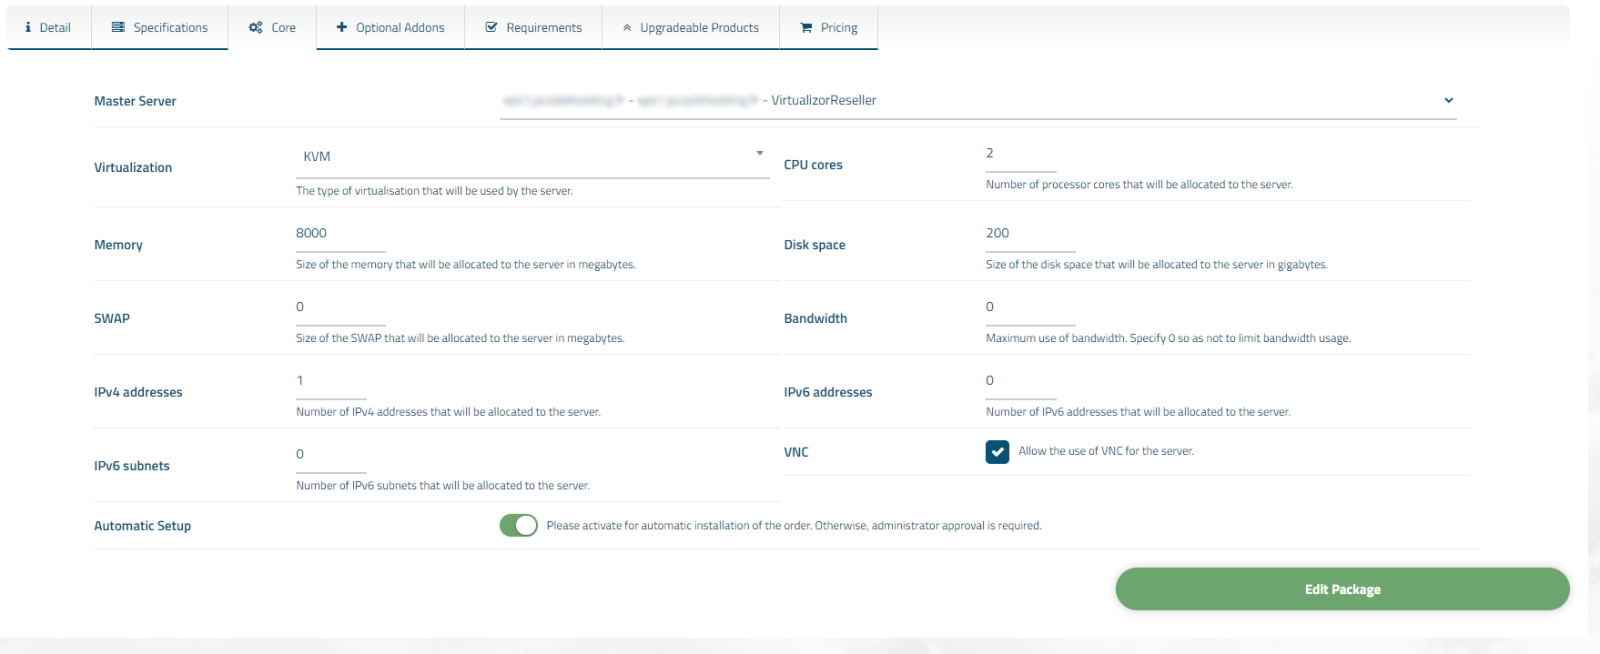
1 - Download on your server the folder named VirtualizorCloud.
2 - Unzip the folder.
3 - Place the VirtualizorCloud folder in the coremio/modules/Servers/ path on your WiseCP system.
4 - Add the 777 permission recursively to the folder.
1 - Go to the module setup page. (Services/VirtualizorCloud Configuration)
2 - Enter your license.
3 - Click on the "Update" button.
1 - Go to the server setup page.
2 - Click on the button to add a new server.
3 - Select the VirtualizorCloud module.
4 - In the field for the username, enter your API key. And in the field for the password, enter your API pass. Then enter the other information requested in the other fields.
Information: You can find the API key and API pass on your reseller panel.
5 - Click on the button to add the server.
1 - Go to the order requirements page.
2 - Click on the button to create a new requirement (it is possible to create a group to place the requirement in, this will have no impact on the operation of the module or on the configuration of a product).
3 - Configuration required for the module to work:
For the English language:
Name: Operating system
Related Service Group: Server/VPS
Mandatory: Yes
Option Type: Dropdown
For the French language:
Name: Système d'exploitation
Related Service Group: Server/VPS
Mandatory: Yes
Option Type: Dropdown
In the first field of the list, enter the name of the operating system (Example: Debian 10). And in the second field, enter the name of the operating system, but the one found on your Virtualizor reseller panel (Example: debian-10-x86_64).
Information: To find the name of an operating system on your Virtualizor reseller panel, go to the "Launch instance" page, select the type of virtualisation, then all available operating systems will be displayed when you click on the field to select the operating system.
Caution! Don't put any operating system, put only those available on your Virtualizor reseller panel.
4 - Click on the button to create the order requirement, then create a new order requirement (You can create the requirement in a different group from the other, this will not affect the operation of the module).
5 - Configuration required for the module to work:
For the English language:
Name: Hostname
Related Service Group: Server/VPS
Mandatory: Yes
Option Type: Input
For the French language:
Name: Nom d'hôte
Related Service Group: Server/VPS
Mandatory: Yes
Option Type: Input
6 - Go to the page to create a product (Dedicated/VPS Packages).
7 - Click on the button to create a new product.
8 - In the "Requirements" part, select the two requirements that were created in one of the previous steps.
9 - In the "Core" part, select the server that will host the VPS, and fill in the fields that appear (it may take a moment for the fields to appear).
For any questions, bug reports, suggestions... do not hesitate to contact us by email at developer@netheberg.fr.
Current version: 1.6.1
Last changes :
Corrected order activation problem on some servers.
") France (France)
France (France)") Worldwide (English)
Worldwide (English)